How to build a PC
Building your own PC is easier than it looks: most parts only fit one way. Here are the 12 steps in the order that works best, each with a drawing of what goes where and the mistakes people really make. Set aside two to three hours for your first build.
Updated October 2026
- Time2–3 hours, plus about an hour for Windows and drivers
- ToolsOne Phillips #2 screwdriver
- DifficultyEasy if you go slowly and keep the manual open
What you need before you start
Eight parts make a PC. Get them all before you begin, and check they fit together first: the PC builder checks the socket, memory type, case size and power for you.
- Processor (CPU) Decides the motherboard socket: AM4, AM5 or Intel LGA1700/1851. How to choose →
- Motherboard Must have the same socket as the processor and take your type of memory (DDR4 or DDR5).
- Memory (RAM) 16 GB in two sticks is the starting point; 32 GB for heavy games, editing or streaming. How to choose →
- Graphics card The most important part for gaming. Skip it for an office PC if the processor has built-in graphics. How to choose →
- SSD A 1 TB NVMe M.2 drive is the usual choice. It screws straight onto the motherboard. How to choose →
- Power supply Pick one from a known brand with some headroom over what your parts draw. How to choose →
- Case Check that the graphics card length and cooler height fit, and look for mesh at the front.
- CPU cooler Many processors come with one in the box. Hotter chips need a tower cooler or an AIO. How to choose →
Also: a USB drive of 8 GB or more for the Windows installer, and a monitor, keyboard and mouse.
- 1 Step 1 of 12
Get your space and tools ready
Clear a table, not a carpet. You need good light, a Phillips #2 screwdriver and a small bowl so the screws don't roll away. Keep the motherboard manual open: almost every "where does this go?" question is answered in it.
Make a Windows installer on a USB drive (8 GB or bigger) with Microsoft's Media Creation Tool before you start, on any working computer. Most first builds take two to three hours, so don't rush.
Tip: Touch the bare metal of the case now and then to get rid of static. A wrist strap costs little if you want peace of mind, but most people build without one.
Next: Step 2, Put the processor in the socket ↓ - 2 Step 2 of 12
Put the processor in the socket
Do this with the motherboard still on its box, outside the case. Lift the socket lever (and the metal frame on Intel and AM5 boards). Find the small triangle on one corner of the processor and the matching triangle on the socket.
Hold the chip by its edges, line the triangles up and lower it straight down. It should drop in under its own weight. Close the frame and lever; on Intel boards the plastic cover pops off as you do, which is normal and a little scary the first time.
Tip: On Intel and AM5 boards the lever needs a firm push and can make a crunchy sound. That's normal. AM4 closes with almost no effort. If the chip isn't sitting flat, stop and reseat it instead of pushing harder.
Next: Step 3, Click in the memory ↓ - 3 Step 3 of 12
Click in the memory
With two sticks, use slots A2 and B2: on most boards that's the second and fourth slot counting from the processor. The manual shows it if your board is different.
Open the clips, line up the notch on the stick with the bump in the slot, and press both ends down firmly until the clips snap shut. It takes more force than you'd expect.
Tip: With one stick, use A2. Two sticks in A2 and B2 run in dual channel, which makes many games noticeably smoother than a single stick.
Next: Step 4, Fit the M.2 SSD ↓ - 4 Step 4 of 12
Fit the M.2 SSD
Find the M.2 slot nearest the processor; it's usually the fastest and often hides under a small metal heatsink. Unscrew the heatsink first.
Slide the drive in at about 30 degrees, press the far end down flat and hold it with the tiny screw or the tool-less latch. Put the heatsink back.
Tip: The heatsink has a thermal pad with a thin plastic film on it. Peel that film off, or the pad does nothing.
Next: Step 5, Mount the CPU cooler ↓ - 5 Step 5 of 12
Mount the CPU cooler
The stock coolers that come in the box already have paste on them, so just screw them on. For any other cooler, put a pea-sized dot of paste in the middle of the processor. The pressure spreads it; there's no need to spread it yourself.
Tighten the screws a little at a time in a cross pattern, so the cooler sits evenly. Then plug its fan cable into the header marked CPU_FAN.
Tip: Most new coolers have a sticker or film on the bottom. Check before you mount it. Forgetting this is common, and the PC will overheat in minutes.
Next: Step 6, Put the motherboard in the case ↓ - 6 Step 6 of 12
Put the motherboard in the case
Lay the case on its side. If your board doesn't have a built-in I/O shield, press the loose one into the case's back opening first, from the inside.
Check that there is a brass standoff under each hole in the motherboard and none anywhere else. Most cases have them fitted already. Lower the board in at a slight angle so the ports go through the shield, then screw it down. Snug is enough.
Tip: A standoff with no hole above it can touch the back of the board and short it. Count them.
Next: Step 7, Install the power supply ↓ - 7 Step 7 of 12
Install the power supply
In most cases the power supply goes at the bottom at the back. If the case has a bottom intake vent with a dust filter and sits on a hard floor, face the fan down to breathe cool outside air. If the PC sits on carpet or lacks a bottom vent, face the fan upwards into the case.
Hold it with the four screws at the back. If your supply is modular, plug in only the cables you need: the 24-pin, the CPU cable, and the graphics card cable.
Tip: Leave the switch on the back at O (off) until everything is connected.
Next: Step 8, Install the graphics card ↓ - 8 Step 8 of 12
Install the graphics card
Remove the two (or three) slot covers on the back of the case in line with the top long PCIe x16 slot, the one nearest the processor.
Line the card up and push it straight down until the latch at the end of the slot clicks. Then screw its metal bracket to the case so it can't sag or move.
Tip: Heavy cards sag over time. If your card came with a support bracket, use it.
Next: Step 9, Connect the power cables ↓ - 9 Step 9 of 12
Connect the power cables
The big 24-pin plug goes into the long socket on the right edge of the board. The 8-pin CPU cable (marked CPU or EPS) goes to the top left corner, above the processor. Some boards have a second 4- or 8-pin socket there; fill it if you have the cable.
The graphics card takes PCIe 8-pin plugs or one 12V-2x6 (16-pin) plug. Use a separate cable from the power supply for each 8-pin socket rather than daisy-chaining two ends of one cable.
Tip: Only use the cables that came with your power supply. Modular cables from another model, even from the same brand, can be wired differently and can kill your parts.
Next: Step 10, Plug in the case buttons and front ports ↓ - 10 Step 10 of 12
Plug in the case buttons and front ports
This is the fiddly part. The case's power button, reset button and lights go on the small front panel header at the bottom right of the board. The drawing shows the layout most boards use, but check your manual, as it can differ.
Then plug in the front USB 3 cable (the blue one with 19 pins), the USB-C cable if your case has one, the HD_AUDIO cable for the headphone jack, and the case fans into the SYS_FAN or CHA_FAN headers.
Tip: Many boards come with a small adapter block. Plug the tiny case wires into it outside the case, then press the block onto the header in one go.
Next: Step 11, First power-on ↓ - 11 Step 11 of 12
First power-on
Plug the monitor into the graphics card's ports, low down on the back. The HDMI port up on the motherboard only works with built-in graphics. Connect the keyboard, mouse and power cable, flip the switch on the PSU to I, and press the power button.
Be patient. New DDR5 systems spend one to three minutes "training" the memory on the first boot and may restart once or twice with a black screen. Wait before you start pulling things out.
Tip: Building with a 5600GT, 8600G or another processor with built-in graphics and no graphics card? Then the motherboard's HDMI is the right one.
Next: Step 12, BIOS, Windows and drivers ↓ - 12 Step 12 of 12
BIOS, Windows and drivers
Press Delete (or F2) as it starts to enter the BIOS. Check it shows your processor, the full amount of memory and your SSD. Turn on EXPO (AMD) or XMP (Intel) so the memory runs at its rated speed; without it, it runs slower.
Plug in the Windows USB, choose it as the boot drive, and install. After that, install the graphics driver from NVIDIA, AMD or Intel, the chipset driver from your motherboard maker's support page, and run Windows Update.
Tip: A brand-new processor on an older board may need a BIOS update first. Many boards can do this from a USB stick with no processor fitted (look for "BIOS Flashback" or "Q-Flash Plus").
Done. Switch it on ↓
If it doesn't start
Nothing happens when I press power
Check the switch on the back of the PSU, the wall socket, and that the power button wires are on the PWR pins. Then check the 24-pin plug is fully in.
Fans spin but there's no picture
Give it three minutes for memory training. Then check the monitor is on the graphics card, the 8-pin CPU cable is in, and the memory sticks are fully clicked in. Most boards have small debug lights (CPU, DRAM, VGA, BOOT): the one that stays lit tells you where to look.
It shows less memory than I installed
One stick isn't fully seated. Turn off, unplug, and press it in until both clips close.
The SSD doesn't show in the Windows installer
Check it shows in the BIOS. If it does, the installer may need the storage driver from the motherboard support page, which is rare on current boards.
The CPU runs very hot right away
The film is still on the cooler base, the cooler is loose, or its fan isn't plugged in. Turn off and check.
Questions
Is building a PC hard?
No. It's mostly plugging things into slots that only fit one way. Allow two to three hours for your first build and keep the motherboard manual open.
What tools do I need?
A Phillips #2 screwdriver is enough for most builds. Cable ties and a torch help. Thermal paste comes with the cooler.
Do I need an anti-static wrist strap?
It helps but isn't needed. Work on a hard surface, avoid carpet, and touch the metal case now and then.
Which slots do I use for two RAM sticks?
A2 and B2 on almost every board: the second and fourth slots from the processor. Your manual confirms it.
Where do I plug in the monitor?
Into the graphics card. Use the motherboard's port only if you have no graphics card and your processor has built-in graphics.
How long does it take to build a PC?
Two to three hours for a first build if you take your time, plus about an hour to install Windows and drivers. People who have done it before need about an hour.
In what order should I build a PC?
Processor, memory, M.2 SSD and cooler go on the motherboard while it is still outside the case. Then the board goes into the case, followed by the power supply, the graphics card and the cables. Doing the first part outside the case is much easier.
Is it cheaper to build your own PC?
Usually, yes, especially for gaming. You choose every part, so you don't pay for a weak power supply or slow memory that ready-made PCs often hide. You also know exactly what's inside when you want to upgrade later.
Can I build a PC without a graphics card?
Yes, if the processor has built-in graphics: AMD chips ending in G (like the 8600G) and Intel chips without an F in the name. Plug the monitor into the motherboard. It's fine for office work, study and light games.
Do I need to buy Windows?
You can install Windows 11 from Microsoft's free tool and use it without a key. Until you activate it, you'll see a small "Activate Windows" note and some personalisation settings are locked.
Still choosing parts?
Start from one of our build guides, or pick parts yourself and let the builder check they fit together.
Parts people are looking at
- NVIDIANVIDIA GeForce RTX 5060 8GB8 GB GDDR7 · 2.50 GHz boost Buy now on Amazon
- LGLG 24GS60F 24" FHD 180Hz IPS24 inch · 1920 x 1080 Buy now on Amazon
- SamsungSamsung 870 EVO 500GB SATA SSD500 GB · SATA SSD Buy now on Amazon
- BenQBenQ PS01 MouseWireless / Wired · 400 DPI Buy now on Amazon
- DellDell kb216 KeyboardFull-size · Wired Buy now on Amazon
- JabraJabra Evolve3 45 UC USB-A with Dongle Stereo (Charging Stand)Wireless Buy now on Amazon
- KingstonKingston FURY Beast 8GB (1x8) DDR4-3200 CL168 GB (1x8) · DDR4 Buy now on Amazon
- LenovoLenovo ThinkPad E16 Gen 4 (AMD) Copilot+ PCAMD 330 · AMD Radeon 820M Buy now on Amazon
- AMDAMD Radeon RX 9060 XT 16GB16 GB GDDR6 · 3.13 GHz boost Buy now on Amazon
- MSIMSI G244F E2 24" FHD 180Hz IPS24 inch · 1920 x 1080 Buy now on Amazon
Latest products
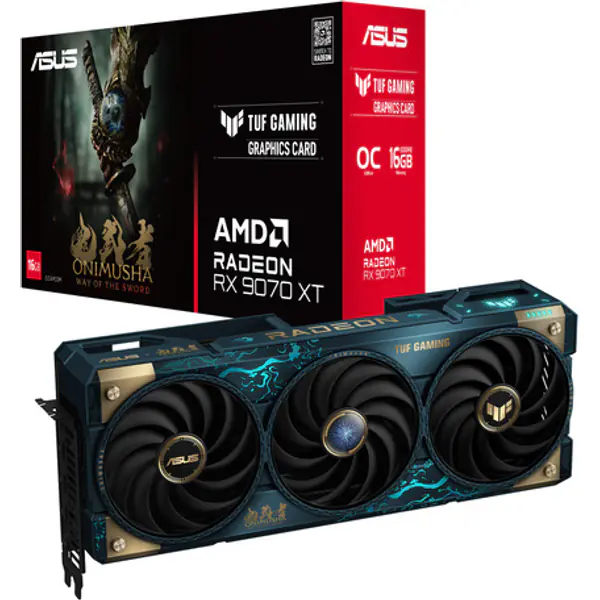
- ASUSASUS TUF Gaming TUF-RX9070XT-O16G-ONIMUSHA Radeon RX 9070 XT 16 GB Graphics Card16 GB GDDR6 · 3.06 GHz boost Buy now on Amazon
- HPHP E82HPET 16″ Laptop16 GB · 512 GB Buy now on Amazon
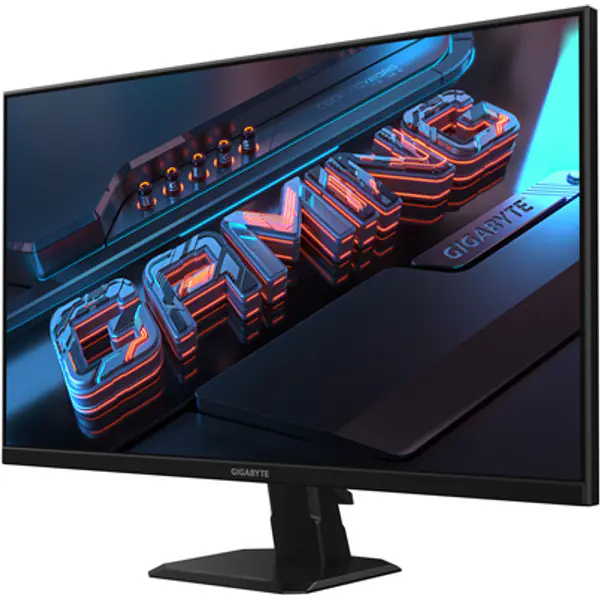
- GigabyteGigabyte GS27FA 27″ 180Hz Monitor27 inch · 1920 x 1080 Buy now on Amazon
- AMDAMD Ryzen 5 5500F6 cores · 12 threads Buy now on Amazon
- Origin StorageOrigin Storage SSD 3.84GB 3.5in SATA RI 1DWPD in Hot Swap Caddy3.84 TB · SATA Buy now on Amazon
- MSIMSI MAG Z890 TOMAHAWK WIFI IIZ890 · LGA1851 (Socket V1) Buy now on Amazon
- BenQBenQ PS01 MouseWireless / Wired · 400 DPI Buy now on Amazon
- Contour DesignContour Design Contour Active Key QuickClean Medical Keyboard IP68 Touchpad Mini Wired White UK C4412Membrane · 60% Buy now on Amazon
- JabraJabra Perform 10 Mono USB-C, Black (Android & iOS)Wired Buy now on Amazon
- ASUSASUS A31 TG WHITEMid-Tower · ATX / mATX / ITX Buy now on Amazon